WordPress
You can add Globus Auth to a WordPress site without writing any code. You’ll do most of the work using a Web browser. After you have a WordPress site set up, it will take about 20 minutes to add Globus Auth logins to it.
This method works because Globus Auth is a standard OpenID Connect (OIDC) service, and there’s already good support in the WordPress community for OIDC.
What you’ll need
- An existing WordPress installation (Download WordPress or Setup a WordPress host)
- An OIDC plugin for WordPress
Your WordPress site must have SSL/TLS security enabled to use Globus Auth. In your Web
browser, the address of your site should begin with https://. You’ll have this
automatically if you’re using a hosted WordPress site. If you’re running
your own server, you’ll need to obtain and install a secure server certificate. We
recommend Let’s Encrypt because it’s free and because it’s easy to use
with most popular Web servers.
Make it happen
In a nutshell, the method for enabling Globus Auth logins in a WordPress site is as follows.
- Obtain and install an OpenID Connect (OIDC) plugin for your WordPress site.
- Activate the plugin and configure it.
- Register your WordPress site with Globus and obtain your site’s
client_idandclient_secret. - Configure the plugin with your
client_idandclient_secret.
Get an OIDC plugin
WordPress has a huge library of plugins provided by community members. The library is accessed from
your WordPress dashboard by clicking Plugins in the left sidebar, then Add New at the top
of the Plugins page. If you search for “openid connect,” you’ll find a large number of social login plugins
that let people login using Google, Facebook, LinkedIn, etc. There’s also a plugin called “OpenID Connect
Generic Client.” The author is “daggerhart” (Jonathan Daggerhart). This is a great plugin to use with
Globus Auth.
Install the OpenID Connect Generic Client plugin by clicking the Install Now button.
Activate and configure your plugin
Now that you have a WordPress site with an OIDC plugin installed, the next step is to configure
the plugin to use Globus Auth. When logged in to your WordPress site, you should see the Dashboard
shown in Figure 1. Click Plugins on the left-side navigation panel.

Figure 1. Show your WordPress plugins.
Click Activate under the OpenID Connect - Generic Client plugin title.
Now that your OpenID Connect plugin is activated, you can configure it. Click Settings
in the left-side navigation panel and select “OpenID Connect Client.” You’ll see the
settings panel shown in Figure 2.
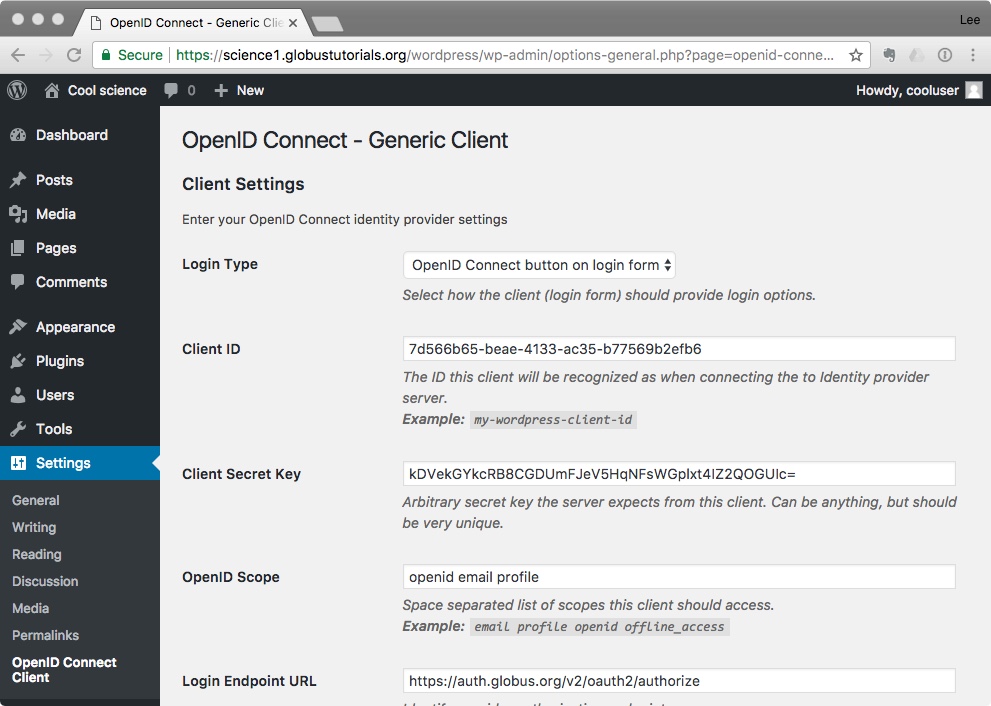
Figure 2. WordPress OpenID Connect plugin settings panel.
To continue, you’ll need a Client ID, a Client Secret Key, and a few other things that you don’t have yet. All of these items come from Globus Auth. So now it’s time to register your Web application with Globus Auth.
Register your application with Globus Auth
Keep the WordPress window open and open another Web browser window. In this one, follow the application registration instructions in the Globus Auth Developer’s Guide. As you follow these instructions, note that the Redirect address you’ll need during registration is provided by your WordPress OIDC plugin. Go back to the WordPress window and scroll to the very bottom of the OpenID Connect configuration page. The Redirect URI is shown at the very bottom of the page, as shown in Figure 3.
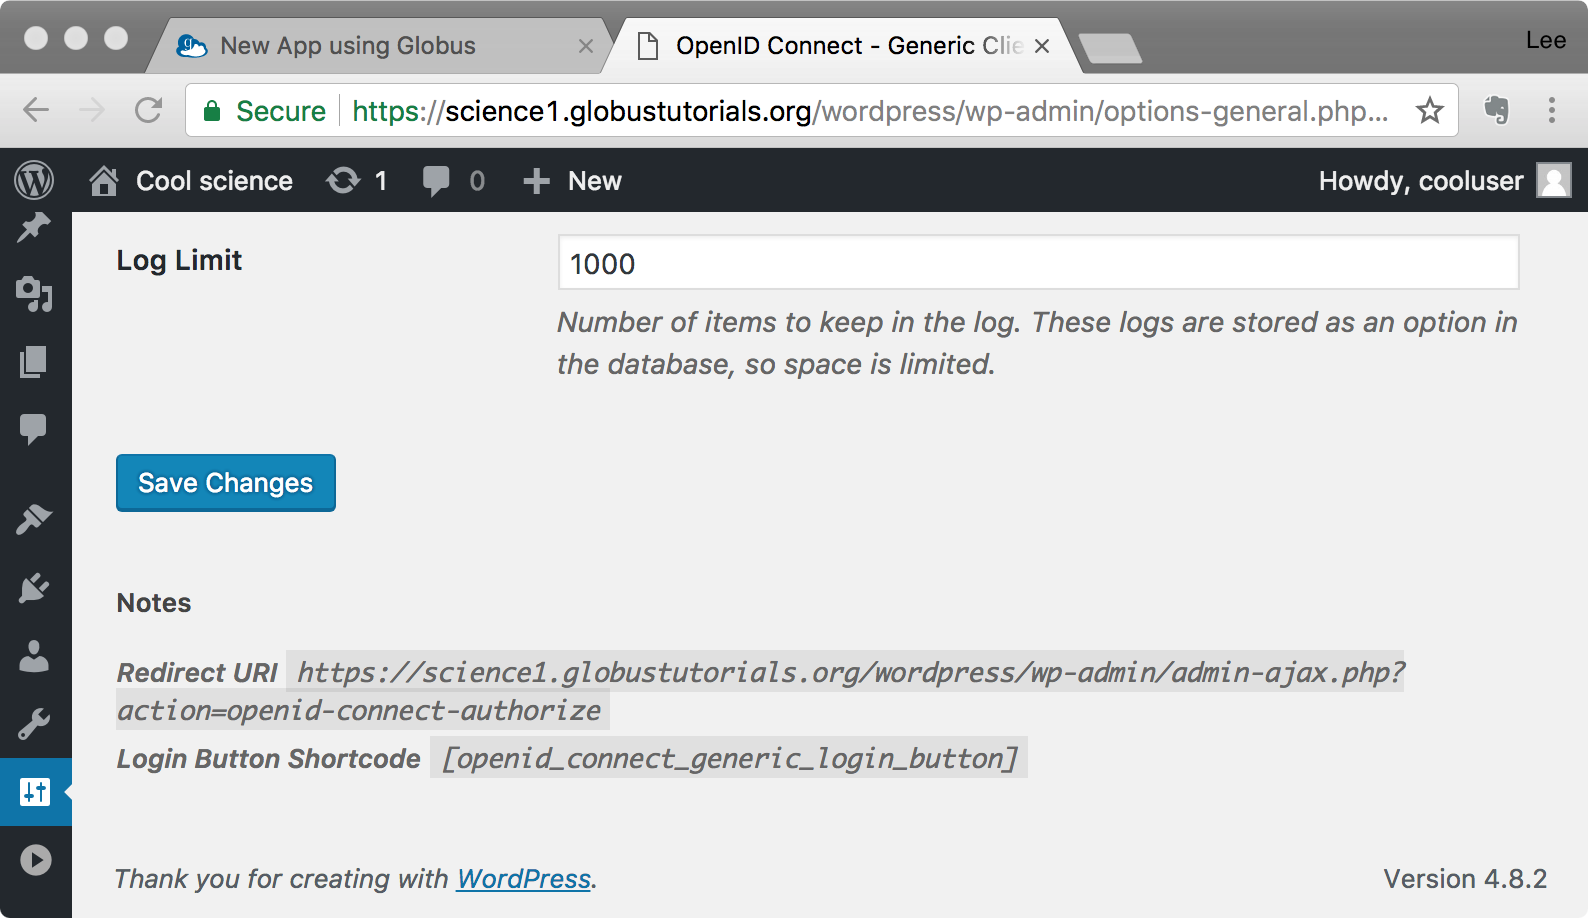
Figure 3. Find the Redirect URI in your OpenID Connect plugin’s configuration page.
When you’ve successfully registered your WordPress site with Globus, leave the registration data page open in your browser. You’ll need it below.
Finish configuring the plugin
Return to your WordPress window, paste in the Client ID, then complete the rest of the settings
panel using the information in the following table.
| OIDC Settings Field | Fill with... |
|---|---|
| Login Type | Default - OpenID Connect button on login form |
| Client ID | Copy and paste from Globus app registration |
| Client Secret Key | Scroll to the bottom of the Globus app registration view and generate a new client secret key. Name it whatever you like, and copy and paste the secret key from the Globus registration window into the WordPress window. If you lose the key, simply generate a new one. |
| OpenID Scope | openid email profile separate each word with spaces |
| Login Endpoint URL | https://auth.globus.org/v2/oauth2/authorize |
| Userinfo Endpoint URL | https://auth.globus.org/v2/oauth2/userinfo |
| Token Validation Endpoint URL | https://auth.globus.org/v2/oauth2/token |
| End Session Endpoint URL | https://auth.globus.org/v2/web/logout |
| Link Existing Users | Check this box! |
| Everything else... | ...leave default values |
When you’ve finished filling out the settings panel, click Save Changes at the
bottom of the page. Your work is done!
Try it out
Once you’ve configured your OpenID Connect plugin, your WordPress site is ready to
use with Globus Auth. Sign out of the site by hovering your pointer over your
userid in the upper-right corner of the WordPress window and select Log Out.
You should see the Globus “Logged out” page, shown in Figure 4.
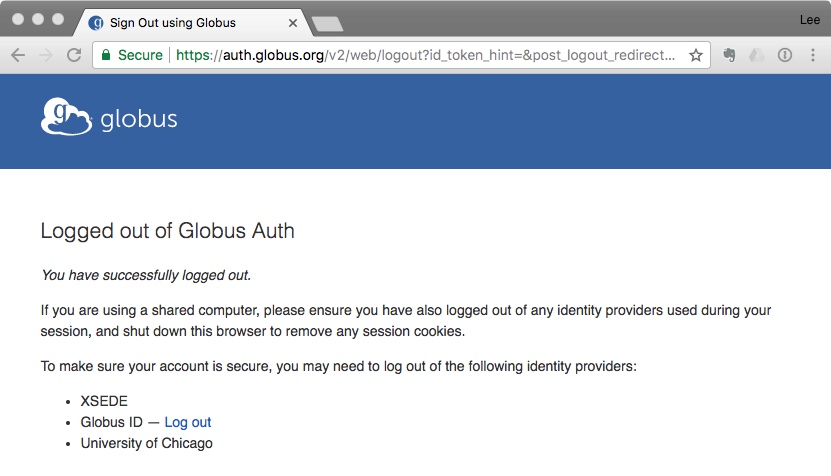
Figure 4. Your new logout page.
For good measure, go ahead and click on the Log out link for Globus ID as well.
Now, when you return to your WordPress site and click Log in, you’ll see the OpenID
Connect button above the login box, shown in Figure 5. (You can change this to
something better, like “Login with Globus,” later.)
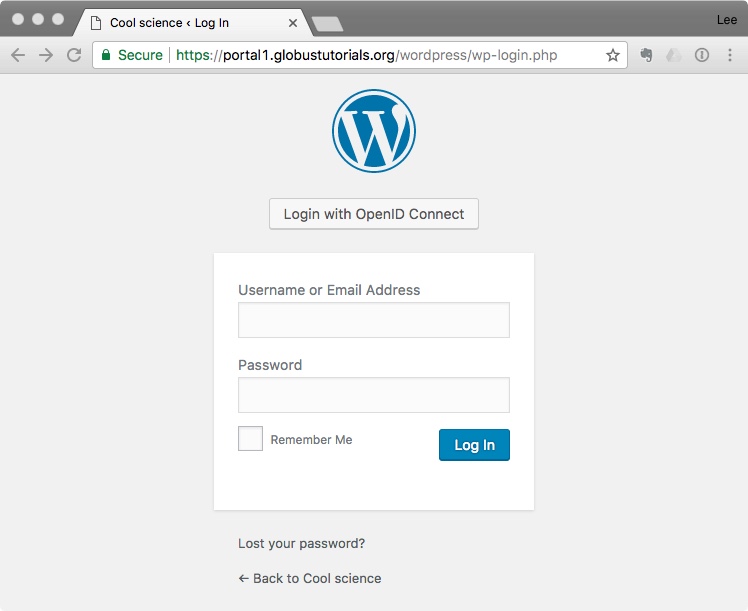
Figure 5. Your login page with OpenID Connect button.
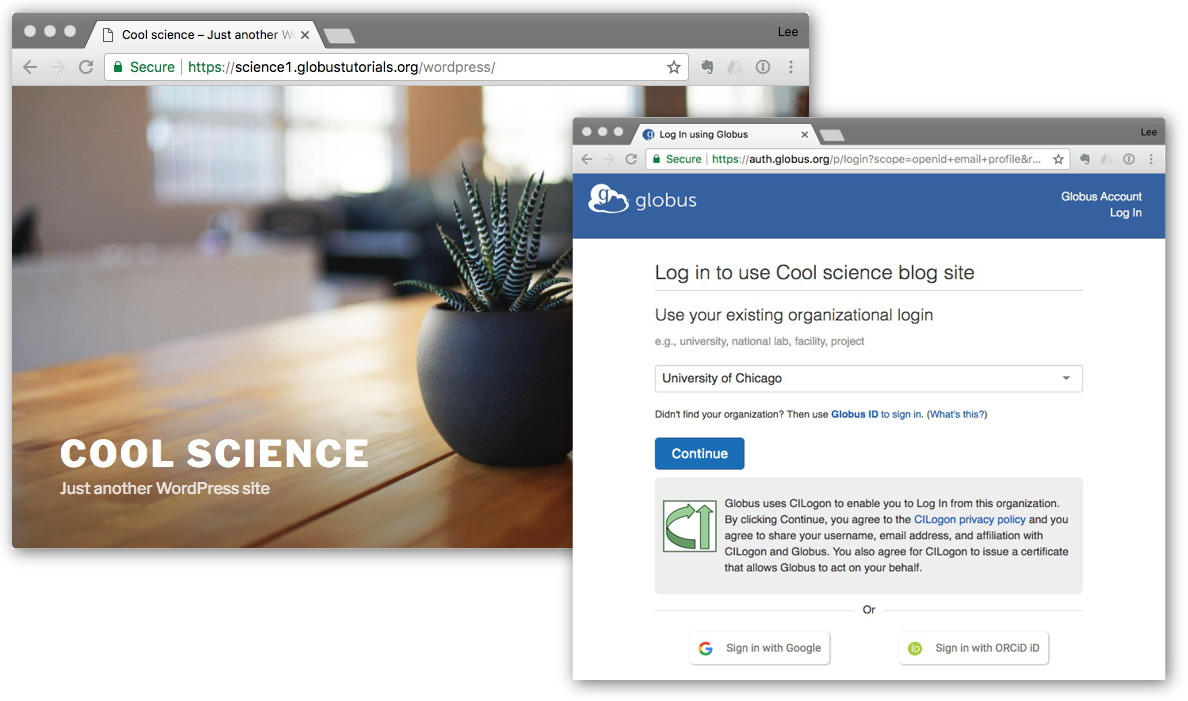
Click Login with OpenID Connect, and you’ll see the Globus login page, shown in
Figure 6.

Figure 6. Your new login page.
Notice that the login page in Figure 6 shows the application name that you entered
when you registered the Web app with Globus Auth. You can change this name at any
time by returning to developers.globus.org and clicking Edit when viewing the
app registration.
When you complete the Globus login, WordPress will create a user account for your Globus identity and assign the basic subscriber role to the account. The same will happen for anyone else who logs in. When you login as an administrator, you can see these accounts and assign different roles where appropriate.