Django
This section shows how to build a minimal Django web application with authentication delegated to Globus Auth. The application leverages Python Social Auth, which at the moment of writing this documentation seems to be the most often used middleware that provides social authentication and authorization mechanism for Python web frameworks like Django, Flask, Pyramid, etc. The example web application you will create in this section step by step is also available in the repository. README.md provides separate instructions describing how to deploy the application quickly.
Start new Django project
First, we will create a virtual environment named venv, activate it to run our web application in the environment and install Django and Python Social Auth packages:
$ python3 -m venv venv
$ . venv/bin/activate
$ pip install django social-auth-app-django python-jose
In the next step, we create project ‘webapp’ with web application ‘webapp’:
$ django-admin startproject webapp
$ cd webapp/
Develop web application
By default, django-admin creates a web application that does not have any views. The only views available are admin views to manage users, groups, privileges, etc, provided by django.contrib.admin. We will create one simple view in the ‘app’ called home that displays ‘Login with Globus’, ‘Logout’ links and some information about an authenticated user. To do it, create webapp/views.py:
from django.shortcuts import render

def home(request):
    uuid = None
    access_token = None
    refresh_token = None
    if request.user.is_authenticated:
        uuid = request.user.social_auth.get(provider='globus').uid
        social = request.user.social_auth
        access_token = social.get(provider='globus').extra_data['access_token']
        refresh_token = social.get(provider='globus').extra_data['refresh_token']
    return render(request,
                  'home.html',
                  {'uuid': uuid,
                  'access_token': access_token,
                  'refresh_token': refresh_token})
The view returns the template, templates/home.html, processed by render() function.
<!DOCTYPE html>
<html lang="en">
<head>
<meta charset="utf-8">
<title>Django Web App</title>
</head>
<body>
<div>
<h1>Django web app with authentication delegated to Globus Auth</h1>
<p>
<br/>
{% if user and not user.is_anonymous %}
Hello {{ user.get_full_name|default:user.username }}!<br/>
Username: {{ user.username }}<br/>
Email: {{ user.email }}<br/>
First name: {{ user.first_name }}<br/>
Last name: {{ user.last_name }}<br/>
Date joined: {{ user.date_joined }}<br/>
Last login: {{ user.last_login }}<br/>
UUID: {{ uuid }}<br>
Access token: {{ access_token }}<br/>
Refresh token: {{ refresh_token }}<br/>
<br/>
<a href="{% url 'logout' %}?next={{ request.path }}">Logout</a>
{% else %}
<a href="{% url 'social:begin' 'globus' %}?next={{ request.path }}">Login with Globus</a>
{% endif %}
</p>
</div>
</body>
</html>
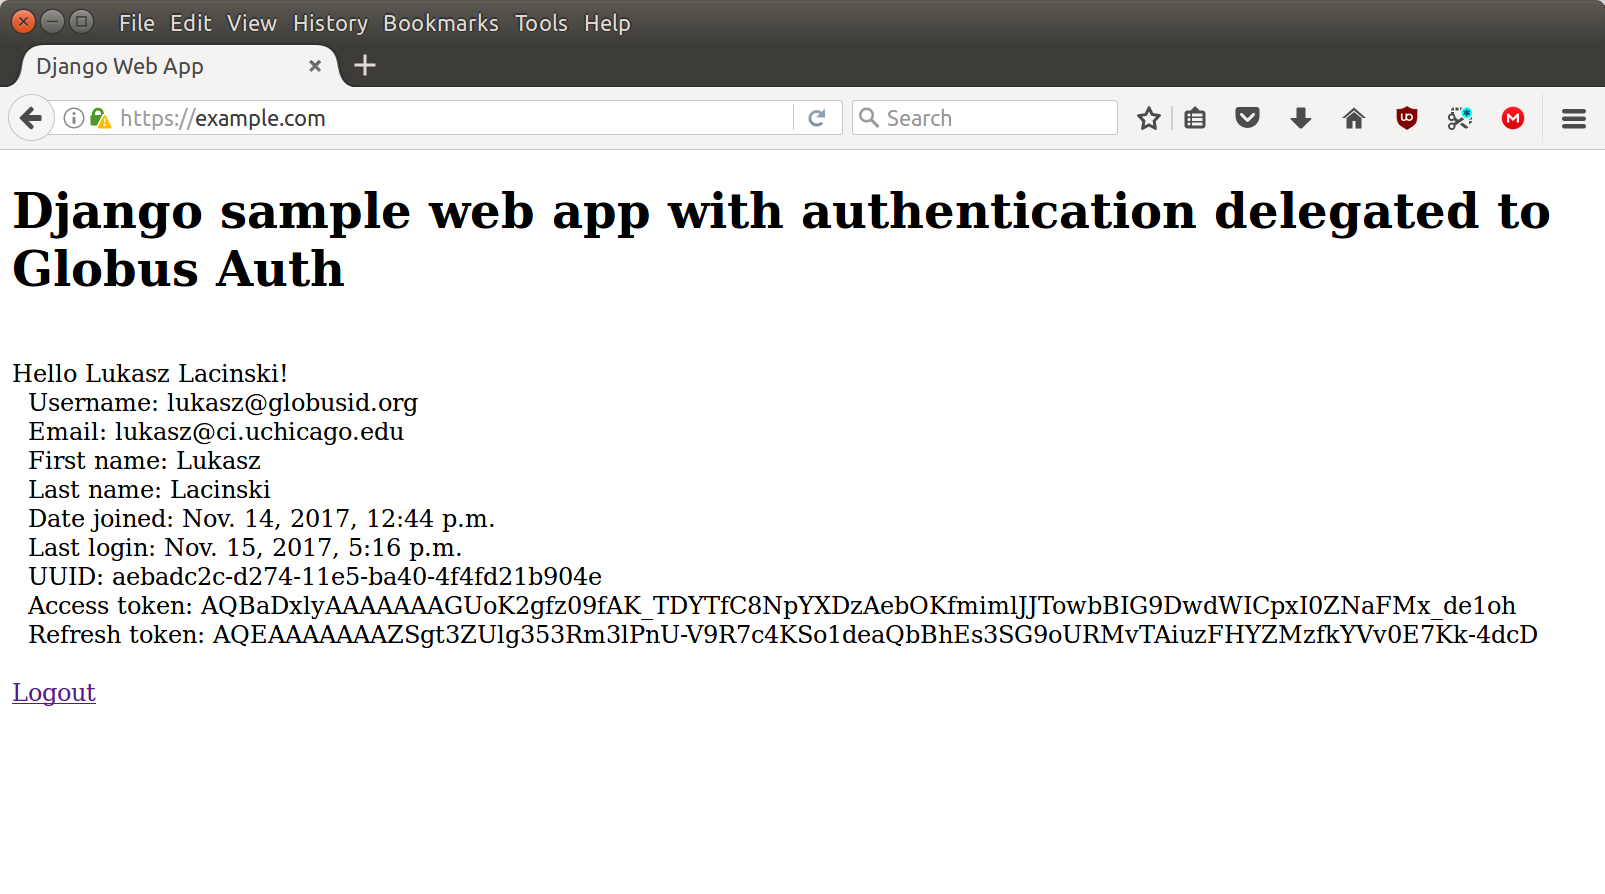
If a user is authenticated, the page shows a username, email, first name, last name, UUID obtained from Globus Auth, and access token that can be used to call Globus services. The template also includes ‘Login with Globus’ and ‘Logout’ links.
To make the ‘home’ view accessible, you need to add a corresponding URL to webapp/urls.py
from django.contrib import admin
from django.urls import include, path
from . import views

urlpatterns = [
    path('admin/', admin.site.urls),
    path('', views.home, name='home'),
    path('', include('django.contrib.auth.urls')),
    path('', include('social_django.urls', namespace='social')),
]
As you probably noticed, another two URL patterns were added. The third one is to enable the ‘Logout’ link. The last one is to support the ‘Login with Globus’ link and other URLs required by OpenID Connect protocol. Views corresponding with the two URL patterns are defined by Django and Python Social Auth.
In the last step, you need to enable the Python Social Auth middleware in webapp/settings.py and by adding:
ALLOWED_HOSTS = ['*']

INSTALLED_APPS = [
    <snap>
    'social_django',
]

TEMPLATES = [
    {
        ‘DIRS’: [os.path.join(BASE_DIR, ‘templates’)],
        ‘OPTIONS’: {
            ‘context_processors’: [
                 <snap>
                 'social_django.context_processors.backends',
                 'social_django.context_processors.login_redirect',
            ],
        }
    }
]

AUTHENTICATION_BACKENDS = [
    'social_core.backends.globus.GlobusOpenIdConnect',
    'django.contrib.auth.backends.ModelBackend',
]
SOCIAL_AUTH_GLOBUS_KEY = '<your_Globus_Auth_Client_ID>'
SOCIAL_AUTH_GLOBUS_SECRET = '<your_Globus_Auth_Client_Secret>'
SOCIAL_AUTH_GLOBUS_AUTH_EXTRA_ARGUMENTS = {
    'access_type': 'offline',
}
To get OAuth2 client id and secret that you have to provide in the settings.py, register this web app on https://developers.globus.org with https://<your_server_host_name/<prefix>/complete/globus/ (e.g. https://example.com/complete/globus/) as a redirect URL.
After all of the changes are made, you can create the SQLite3 database:
$ ./manage.py migrate
As specified in settings.py, manage.py will create SQLite3 database in db.qlite3 file with all neccessary tables required by Django and Python Social Auth middleware.
Configure Apache server
The web app can be run behind an reverse proxy server or executed directly by an HTTP server and communicate with the server through the Web Server Gateway Interface (WSGI). Web applications on production systems usually use the latter approach. If you use Debian-based system, for example Ubuntu, add the following lines to /etc/apache2/sites-available/default-ssl.conf in <VirtualHost _default_:443> section
WSGIDaemonProcess globusapp user=<your_username> python-path=<your_base_dir>/webapp python-home=<your_base_dir>/venv
WSGIProcessGroup globusapp
WSGIScriptAlias /<prefix> <your_base_dir>/webapp/webapp/wsgi.py process-group=globusapp
<Directory <your_base_dir>/webapp/webapp>
    <Files wsgi.py>
        Require all granted
    </Files>
</Directory>
The WSGI* directives are supported by Apache mod_wsgi module. On Debian-based systems the module is provided by libapache2-mod-wsgi-py3 package. After restarting the Apache server, the application should be accessible at https://example.com/<prefix>.